April 25, 2008

Handmade owl salt and pepper shakers

Owls. Salt and Pepper Shakers

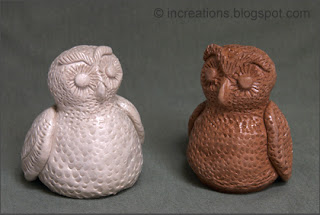
This is our recent creation with the "Keramikal" material — owl salt and pepper shakers. I wrote about this material in other posts, for instance in "Hanukkiyah". Here the material is used in its two natural colours. Put a cloth on the surface you're going to work on and let's start.

DIY quilling tool made from a needle

Home-made Slotted Quilling Tool

I couldn't find a quilling tool in the local stores, so decided to try and build one myself. The version made out of a needle and a pen cap turned out the most successful, it was also pretty easy to make. You will need a mid-size sewing needle with a long eye. First, carefully snip the eye tip off the needle. I clamped the needle in a vice, so that only the tip remains outside, and broke it off with a hammer. You may try doing it using a pair of pliers, but this can be hard because of the sort of steel, used for manufacturing some needles. Finally, thrust the needle into a felt pen cup or a wooden handle.

DIY Slotted Quilling Tool Closeup

Jan 18, 2010: I just wanted to clarify some points regarding the do-it-yourself quilling tool. I made mine using a thin, not thick needle. Then, this tool is a replacement for a slotted tool, not a needle tool. When using a needle tool, you don't spin it around as you do with a slotted tool, but instead wrap a paper strip around the tool with your fingers to create a roll. The paper in this case slides freely around the needle. It's important to keep in mind, that this method can be used only with certain sorts of paper (i.e. good quilling paper), and isn't suitable for the copy and construction paper I use for my quilling.
April 15, 2008

Simple doll made of vine corks

Cork doll

In order to make this doll you will need five corks, five wooden toothpicks and paint. Use a large cork for the body, push the toothpick into the body for the arms, legs and neck. Then cut other two corks in half and use the halves for the hands and feet. Finally, make the head from another cork and attach it. Color the finished doll.

Another funny "recycled" doll can be made from clothespins.

Quilled peacock card

Quilled Peacock Card

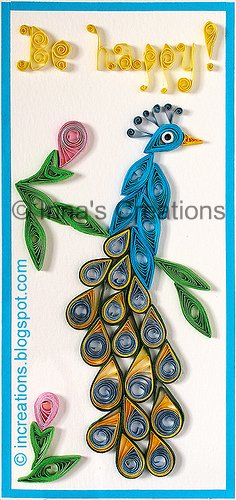
I created this peacock card with almost solely simple quilling shapes: eyes and teardrops. The tail feathers are made of tricolor strips. As I use hand-colored and hand-cut quilling paper strips, I painted both sides of an A4 size paper in three different colors — green, yellow and blue (in this order). Each color took a third of the sheet. Then I cut my strips. If you have pre-cut quilling papers, just join strips of different colors to get a single strip for each feather. When quilling the teardrops for the feathers, I started rolling from the blue end, so that the blue part went inside, and the green outside. The yellow in between. This gave my quilling a special look, I hope.

As you can see, my quilled peacock has also nice big eyes and elegant V-scrolls on its head. The quilled letters were the difficult part, but I found the inspiration in this alphabet letters pattern.

April 14, 2008

Thank you card: Quilled iris flowers

Iris flowers, quilling

More of my paper quilling. Flowers, butterflies... I don't buy quilling paper, but cut 3 mm (or 1/8'') strips of available colored paper or even hand-dye plain copy paper. The strips can be also used for framing and lettering, like in this card.

If you are a beginner in paper quilling, check out this quick-start video: "An Introduction to Quilling".

UPDATE: This is one of my early quilled creations. I've been quilling for more than a year since it was published. You can read my other articles (including tutorials) and look at my quilling artwork by clicking on "quilling" label.

April 11, 2008

Simple greeting card with a ladybug

Ladybug - Happy Birthday!

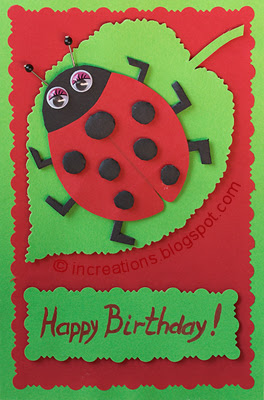
I made this birthday card using colored paper, wiggly eyes, beads and office pins for antennae, and thick mounting tape to create layers.

April 6, 2008

Quilled cherry blossom card

Cherry Blossom (Quilling)

My first attempt at paper quilling. I cut strips of regular coloured paper and of plain paper, coloured with water colours. I also used a tea package for additional decoration (the two side elements). There are lots of resources on paper quilling on the net, try the Google search, for example.

Floral motif on a CD with spiral flowers

Paper flowers on a CD

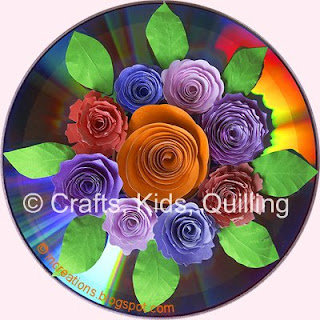
I made this composition using the same technique as for the floral card, but this time on a CD. Just to remind you how to make the spiral roses: