
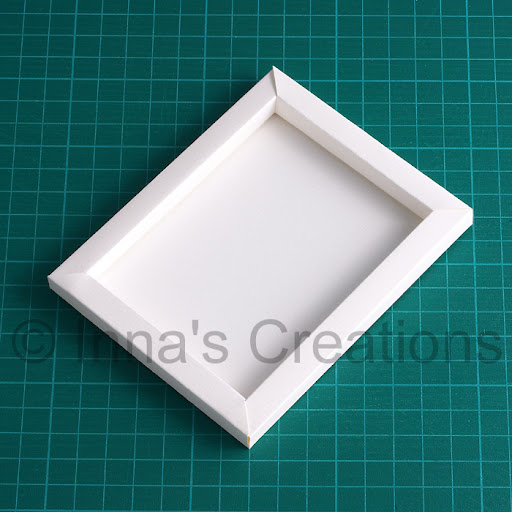
This time I'd like to share with you a simple and easy way to make a paper picture frame, like the one shown in the photo above. Personally, I like using such paper frames for my quilling.

This is how the template for such a frame looks like. Please note, that not the absolute size but the ratios are important for this explanation. Using this template you can make a frame that has borders of equal width and height. The parts to be removed are marked in red, the inner bold rectangle shows the part of a picture that will be visible.
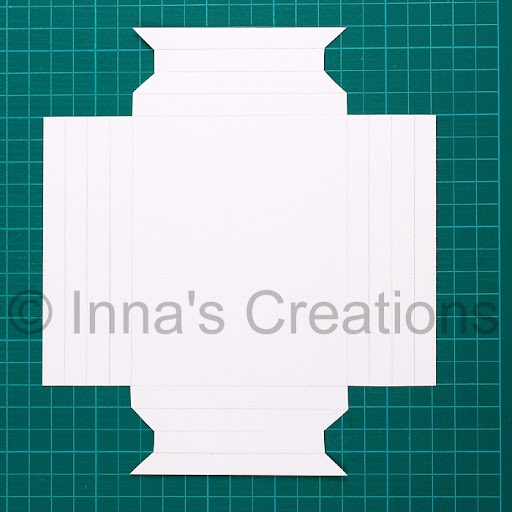
So, first measure a picture you'd like to frame. Add ten times the width of the frame border to both dimensions. For example, if your picture is 10x15cm with 1cm wide border, the resulting size would be 10+10*1 by 15+10*1 = 20x25cm. Draw a rectangle according to your calculations and cut it out. Then measure and mark the folding lines and corners as the template shows. Start measuring from the outer edges of the paper. Cut away the parts shaded with red.
To remind you, only the relative size of the parts is important. That is, if you want to make wider (and higher) borders, just multiply each number in the picture by the same factor.
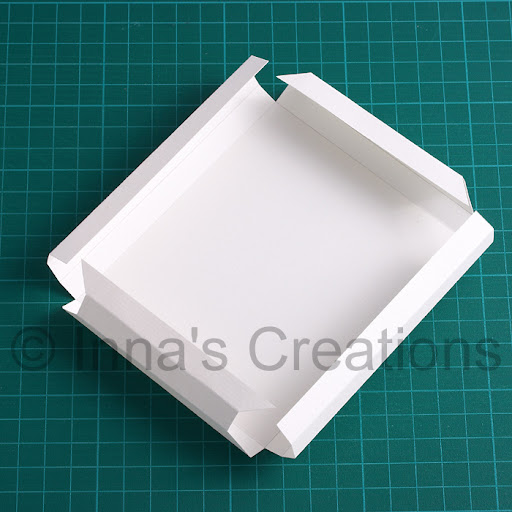
Score the folding lines marked with blue dashes on the template. Use a special scoring tool, a thin embossing tool or simply a stick with rounded tip. Then fold as shown in the picture.
If you already have a picture to frame, glue it down now and then start assembling your paper frame.

Insert an end of each side border into its neighbor's end at the corners, one by one, like shown in the photos.
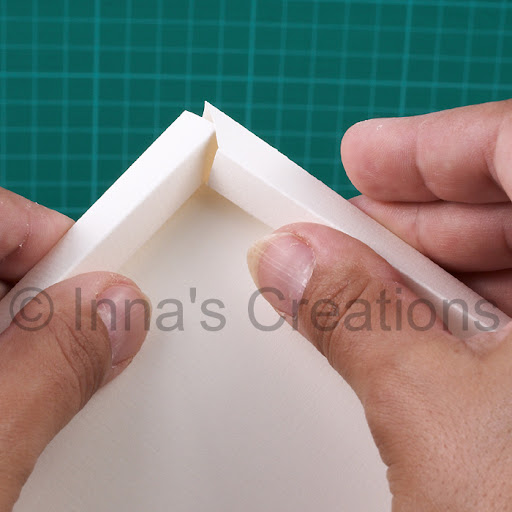
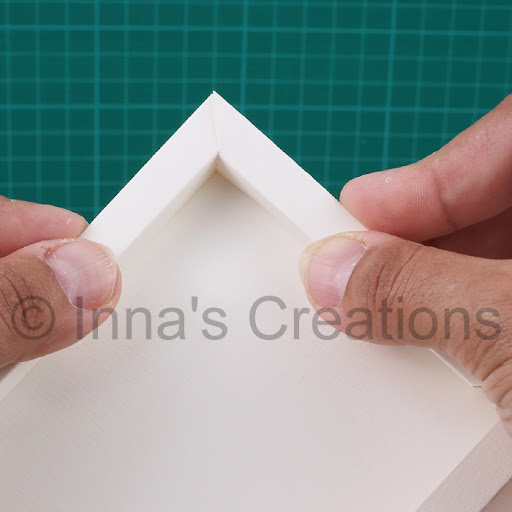
Generally, no adhesive is needed, but you may want to secure the frame with a small amount of glue.
If you want to make a frame with wide borders, the template will look like this (pay attention to the proportions):

And this one is for a deep frame, where the border's height is greater than its width.

The same principles apply for these templates as well: if you want another size, just multiply the numbers by a constant factor.
My other projects framed in home-made paper frames:
- Dandelion
- Lily flowers and dragonfly
- Orchid
- Moth and thistles
- Flowers and bumblebees
- to be continued... :)
UPDATE: Check out the template and instructions for making a more attractive beveled picture frame: How to make a beveled picture frame out of cardstock.
65 comments:
I'm so glad you did a tutorial for your paper frames - I've been wondering how you make them - thank you!
wow......thank you thank you so much :)......you are the best :)
Maddie
Я тоже делаю такие рамки из бумаги для акварели. Очень удобно. Думаю, многим пригодятся эти схемы.
Аааа, моя лбимая рамочка, спасибо за узкую схемку!
Инна, красивая работа! а рамка - хороший МК. Про такую рамку давно знаю, но не пробовала сделать ) как-нибудь руки до нее дойдут )
wonderful
bravo!!
Thanks everyone! I'm pleased to know that you like this tutorial.
Спасибо всем! Мне очень приятно, что вам понравился мой мастер-класс.
I made the frame it's very easy
But i did something that i want to share it with you
I mixed 1 part of glue with 3 parts of water and i covered the surface I let it dry and the frame became hard I thing if you use the napkin tecknique you can decorate the folding partw of the frame
Thank you very much for the idea
BIKY, great idea! Thanks for sharing.
awesome simply awesome.thanks thanks alot for sharing such a nice project with us inna
Thank you, Rumma!
What a clever frame and a great tutorial -- very clear instructions. Thank you so much for sharing!
You're welcome! Congratulations on your e-book! I only had a chance to glance at it briefly, but it looks great!
hey inna how r u? inspired by your blog i m starting my new blog n invite u to my blog..http://www.rumaslife.blogspot.com/
Hello!
I loved the model of the paper frame, I will be very useful because it can be used as frames and as a framework.
I'll keep giving a look around, and I hope your visit in my blog: www.magialilas.blogspot.com.
Goodbye!
Inna,
This is really cool!! I made a couple of them it came out very nice and neat, thank you for the detailed instructions. Love ur blog...
Keep rocking!!
-
Madhu
Madhu, you're welcome! Glad it came in handy.
I usually keep really busy. Got a 3 month old at home. Now festival season is coming. I will certainly try out your ideas by following awesome instructions.
Hope I can decorate my home well.
You're welcome, Pragati! Glad you liked this.
please please please post more frame templates, i keep checking your blog to see if you've posted the template for the latest frame you're using....are the frames your own designs or do you source them from somewhere? Please please share :)
The designs are mine, although there are others very similar (especially to the old one). The new frame will be coming soon, please be patient.
thanks so much, inna! here's a link to some of the work i have done (and where i've used your frames!)
looking forward to more designs
-Rohini.
sorry, i forgot to post the link!
Here it is!
http://www.facebook.com/album.php?aid=148129&id=500504288&l=22e47dd2ac
Rohini, I tried to comment on your Facebook, but I couldn't. Just wanted to say that your quilling is beautiful. Well done!
Looking forward to see new creations of yours.
Hi Inna, thanks so much!
one can't comment on facebook unless they have an account on it, plus i'll need to add you as a friend since what i sent was an external link. if you are on facebook, i'd love to add you to my network :)
look out for my invite!
Hi Rohini, I'll respond by email when I can.
Its very great work no words say
To be honest, I find this hard to follow and vague. Dissappointing.
Hi Inna,
thanks for sharing your tutorial. I made one by folowing this^^
best regards,
ThaoNguyen.
That's great!
really wonderful
Thank you!
Dear Inna,
Thank you for this really great worskshop! We were very much inspired by it and when we were thinking over the prize for the participants of the festival of children's land art works organized in our blog, it was the frame created by you which inspired us!
http://parentsideas.com/2010/08/itogi-i-prizy-konkursa-festivalya-detskix-rabot-v-stile-lend-art
Anastasia
Thank you! beautifully
You are welcome!
Hi Inna,
LOVE the frame and going to try them. Would you share what is the thickness of the paper you use? Thanks ;)
Thanks, ✿ n0ra ✿.
It's a card stock about 140lb (300gsm), maybe less.
Dear Inna,
Thank you so much for your frame templates. I teach Art to grades 3-8 and these frames are perfect for our limited budget. We are currently doing white paper sculptures and they look great in the frames which are light enough to easily hang on a wall or bulletin board. We are indebted to you.
grandmajeanb
Thank u so much...it is so helpful & im so grateful....but i cannot see the dimensions in the frame because it is small....could you pls tell me that?
thank u:-)
Thank you grandmajeanb and Divya!
Divya, just click the images, and please read the text for details.
to be honest iv'e never fallen in love with any other quill sites except yours .all your instructions are fabulous.this paper frame is really a fantastic idea.
Thank you very much, Angelin!
This is fantastic Inna !! Thanks for sharing :)
I can't wait to make it !!
You're welcome, Khushboo! Glad you liked it.
hi there, i'm just a beginner in quilling. your blog is really a nice place to dig in. thanks for this piece of great sharing on the paper frame.
Thank you!
Olá! Seu blog é um sonho! Gostaria muito de fazer as suas molduras, tenho dificuldade de acompanhar o passo a passo... queria lhe pedir para postar em vídeos... você faria isso? Beijos
@Catia Marx
Thank you, I'll consider making a video tutorial.
Thank you very much, simple and perfect
hi,
thanks a lot for sharing this tutorial.
i tried A4 size printer paper and result is good.
thanks
swarna
mycraftworks.blogspot.com
You are welcome!
My son asked me to make him a paper frame, and I can't believe there's actually a tutorial for it!
grazie Inna per gli interessanti tutorial che metti a disposizione di tutti e brava per gli splendidi lavori Quylling, che fino a qualche mese fa non sapevo neanche cosa fosse e di cui vedendo i tuoi lavori mi sono innamorata. grazie a te sto imparando tante cose!!! Ancora GRAZIE
Enfim compreendi!Thanks
Wow..it's so simple, thanks a lot Inna, nice to know your blog, beautiful content:)
This is great! Thank you. Will try the frame out today.
Meira
wow!!! you are the best of all!!! simply amazing! i have no words to describe u and your artworks!!! your creativity and excellence in quilling is astounding!!! just tried this frame... thank you so much Inna :)
Hi Inna
Thank you for sharing! However, I'm a little confused with the dimension. If I wish to have wide border, like your 2nd template, how do I measure and cut the paper? For example my picture is 15cm x 10 cm. Is it 15+10*3 and 10+10*3?
Thank you. :)
Thanks Inna...
I made a frame using the guide from the your tutorials and loved it!
it can be viewed here http://ahandfullofart.blogspot.in/2013/09/a-baby-album.html
Thanks abunch again for the awesome tutorial :)
hugs!
Manu
Thankyou..thankyou so much for this wonderful tutorial..I've attempted to make one last week, it didn't turn out so well in the corners..I realized why is it so..thankyou once again..
Thank you so much Inna for this wonderful tutorial. With the help of this, I was able to make one. Here's the link:-
http://happilyevacrafter.blogspot.in/2015/06/quillography-home.html?m=1
Thank you, Jasleen, very beautiful!
Very useful tutorial, thank you!
Very nice! So simple and yet so beautiful! Thank you a lot!
Wow this is really nice. Thank you so much for sharing this.
Post a Comment